
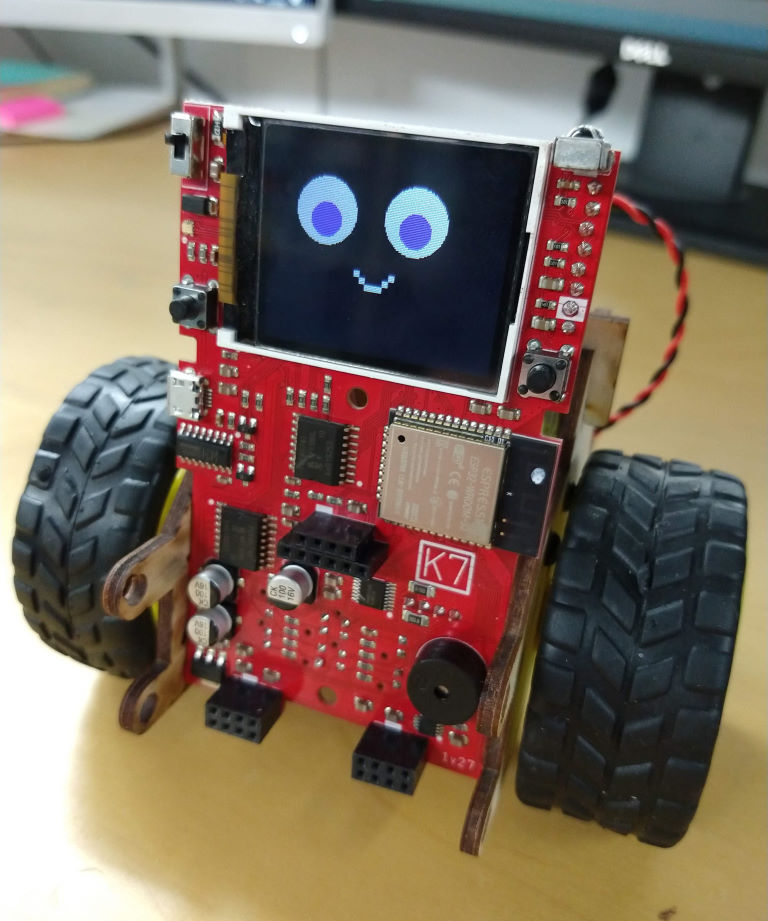
K7 EDUCATIONAL ROBOT RESOURCE PAGE
To inquire about purchasing robots, please use the contact form
GETTING STARTED:
- 1. Get the Arduino Programming Environment (IDE)
- 2. Install ESP32 for Arduino
- 3. Download the latest firmware (ZIP) – Version 0v29
- 4. Choose the Board type: “ESP32 DEV Module” under Tools Menu and Board
- 5. Plug in the Robot via USB and choose the COM Port under Tools Menu and Port
- 6. Upload the Firmware under Sketch Menu and Upload
- Optionally – Install the CH340 USB-to-Serial driver for Windows
GETTING TO KNOW YOUR ROBOT:
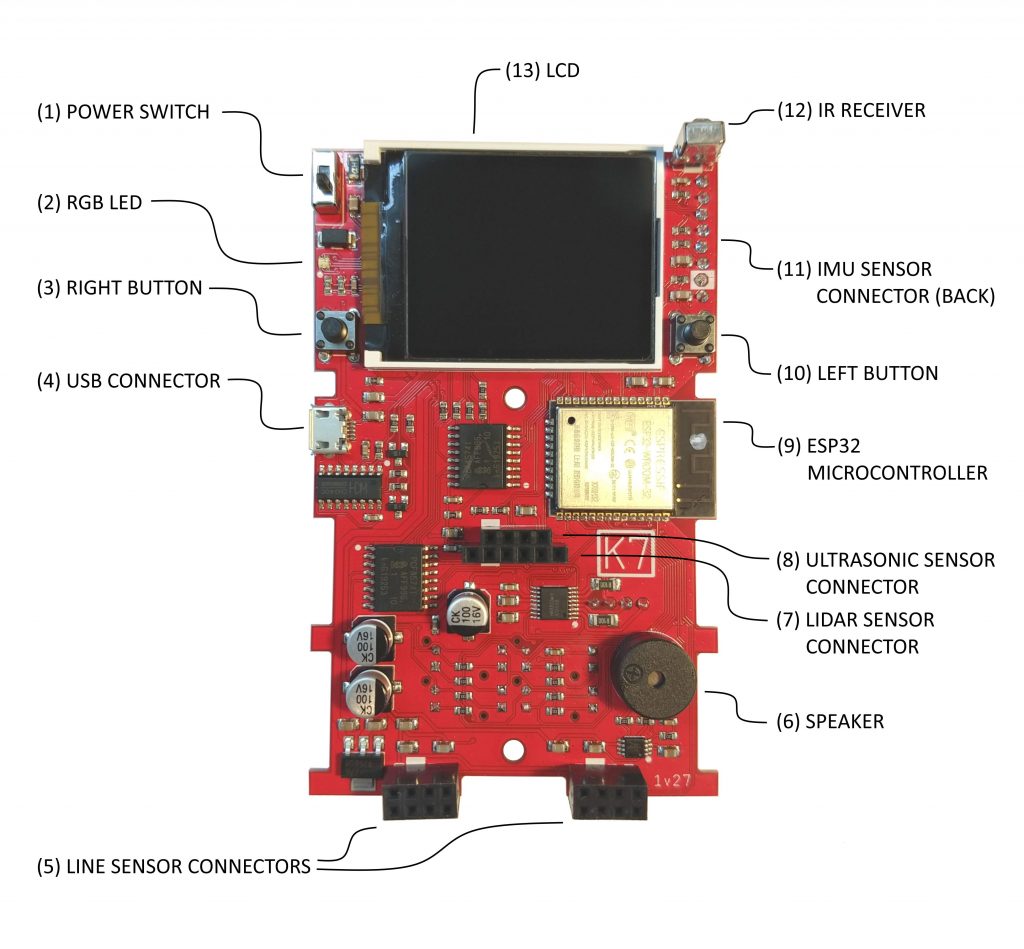
- 1) POWER SWITCH – Slide switch up for battery power, slide switch down for off or USB power
- 2) RGB LED – Makes colored light
- 3) RIGHT BUTTON – Configured in software
- 4) USB MICRO – Plug into computer for uploading from Arduino IDE
- 5) LINE SENSOR EXPANSION CONNECTOR – Plug in optional line sensors (White rectangle denotes GND pin)
- 6) SPEAKER – Makes noises
- 7) LIDAR SENSOR CONNECTOR – Optional plug in, measures distance with light (White rectangle denotes GND pin)
- 8) ULTRASONIC SENSOR CONNECTOR – Optional plug in, measures distance with sound (White rectangle denotes GND pin)
- 9) ESP32 MICROCONTROLLER – The robot brain is Arduino compatible and has WiFi and Bluetooth
- 10) LEFT BUTTON – Configured in software
- 11) IMU SENSOR CONNECTOR (BACK) – Plug in optional accelerometer (White rectangle denotes GND pin)
- 12) IR RECEIVER – Receives signals from TV remotes (38kHz)
- 13) LCD – 160 x 128 pixel full color display
NOT INDICATED
- 14) OPTICAL ENCODER ( BOTTOM BACK) – Tracks the wheel position with the slotted disk
- 15) POWER CONNECTOR (TOP BACK) – Connects to the battery pack
Line Following Example
Requirements
- K7 Robot
- Arduino IDE
- Two (2) IR Proximity Sensors
- Black tape or marker
Intro
This project will teach you how to make the K7 robot follow a black line with a few simple lines of code. The two infrared (IR) proximity sensors will be needed to detect the black line. The K7 robot takes this information and will then activate the motors to move according to the code you will write.
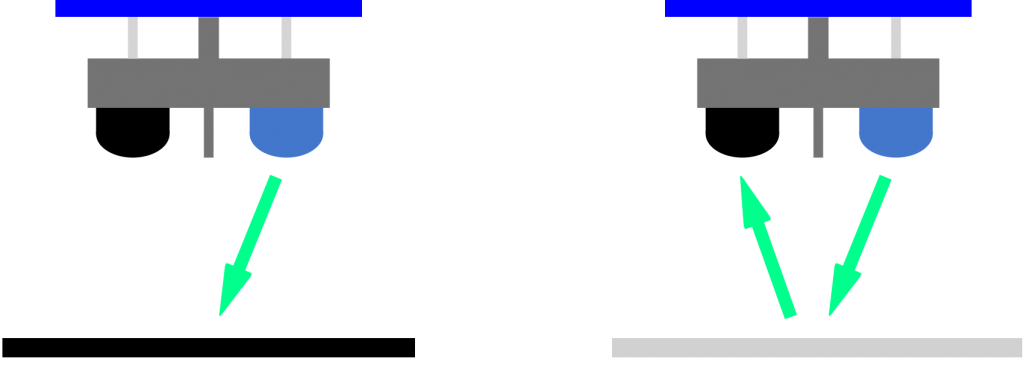
Concept of Line Follower
The infrared (IR) sensors work by emitting infrared light and detecting the reflection. The transmitter component is an infrared LED and the receiver is a phototransistor. The blue LED on the right of the sensor is the transmitter which will send out infrared light and the black phototransistor on the left of the sensor is the receiver which will take in the light. In this case, it will be registering the reflection off of a light or dark surface. A black surface will absorb most of the light and little will be reflected whereas a lighter surface will reflect light that the sensors can pick up.
Depending on how much reflected light the IR sensors are receiving, there will be a change in voltage from the sensor. This changing analog voltage is digitized by the K7 Robot’s analog-to-digital-converter (ADC).
The K7 robot uses a ESP32 microcontroller which runs at 3.3V and the ADC (analog-to-digital-converter) can read up to 212=4095. With the ADC, the analog voltage will be read and converted into a numerical value from 0 to 4095 counts.

With this robot, a low number count means high reflection (no line) and a high number count means low reflections (black line). For the K7 robot, the sensors returned approximately 16 to 48 counts when there was higher reflection (no line) and approximately 2700 to 3300 when there was black (line) underneath. The cutoff point where we decide if there is a line or no line would be around the midpoint between 48 and 2700, which is about 1326. This number is close to 1024 which is equal to 210, an easy number for the microcontroller to work with. With this in mind, we will choose 1024 to be the cutoff count, assigning any number less than 1024 to mean there is no line and any number above 1024 to mean the sensor is over the black line.
Code Explanation
First, we will have to decide what the robot will do depending on what the sensor is detecting. Then, we will have to tell the robot to perform an action in response. An easy way to do that is to assign an arbitrary number to each state and action. For example,
| Line State | Left Sensor | Right Sensor | Action |
| 1 | No line | No line | Straight |
| 2 | No line | Line | Turn right |
| 3 | Line | No line | Turn left |
| 0 | No line | No line | Stop |
Case 0 | Case 1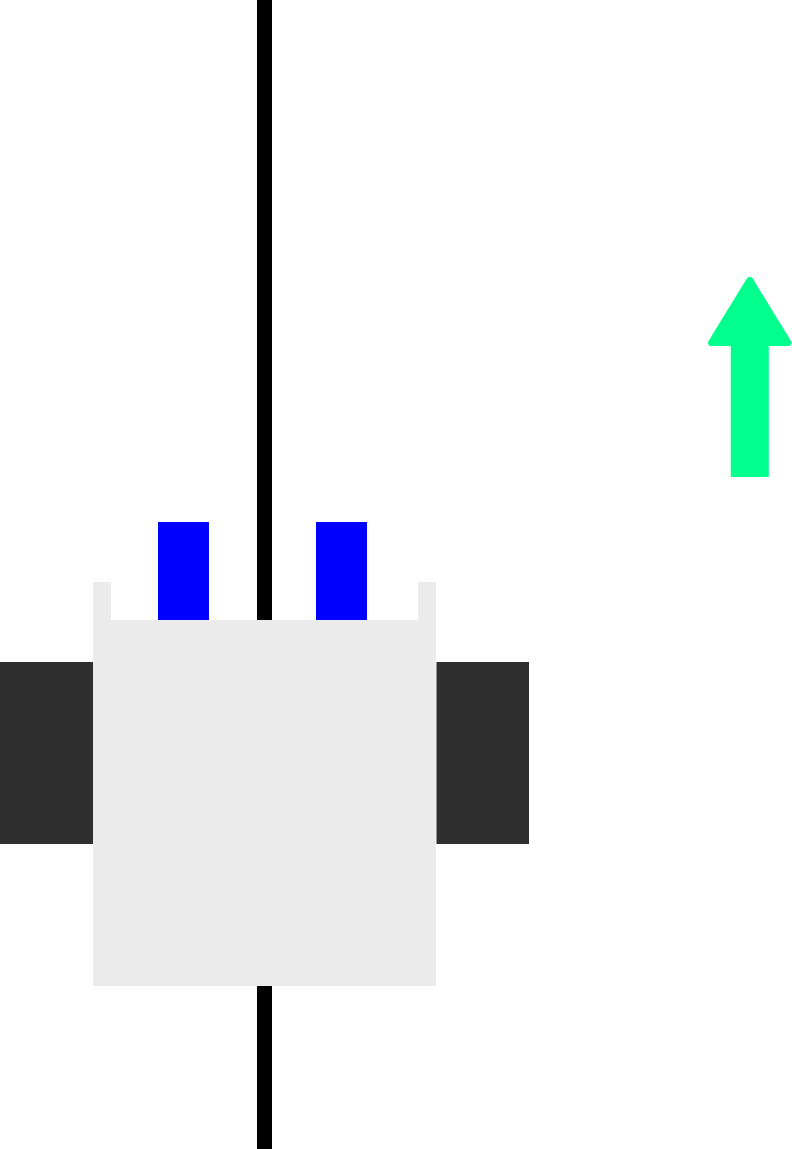 |
Case 2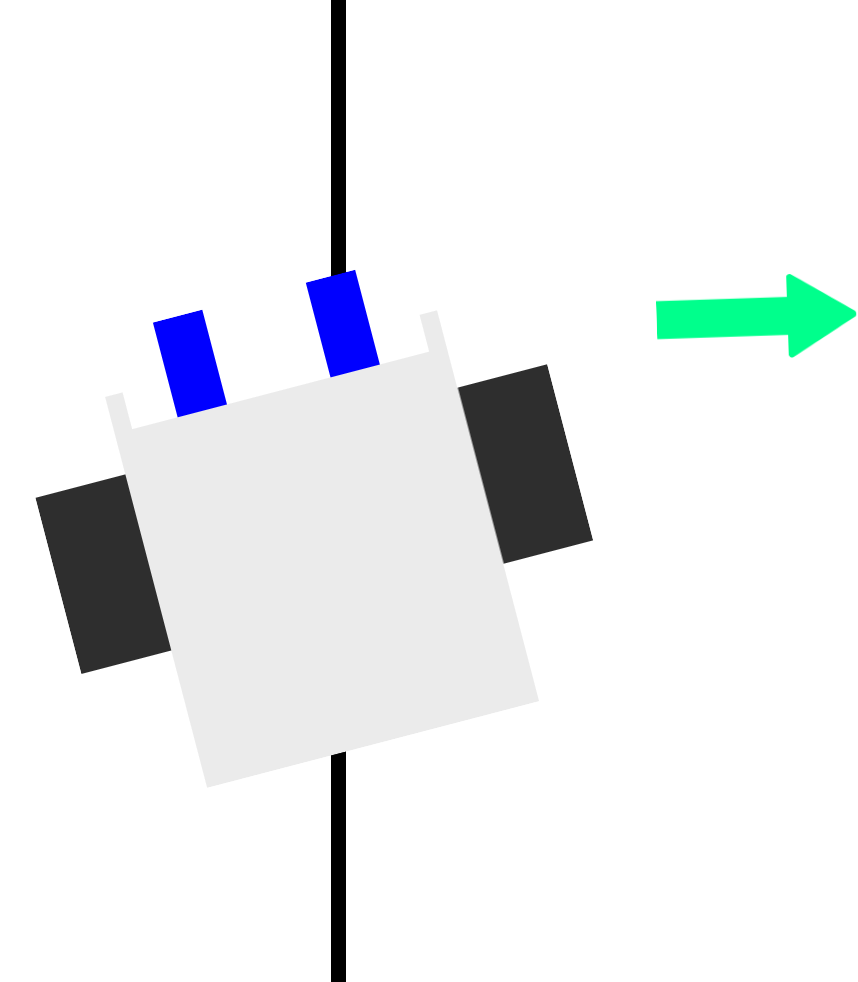 | Case 3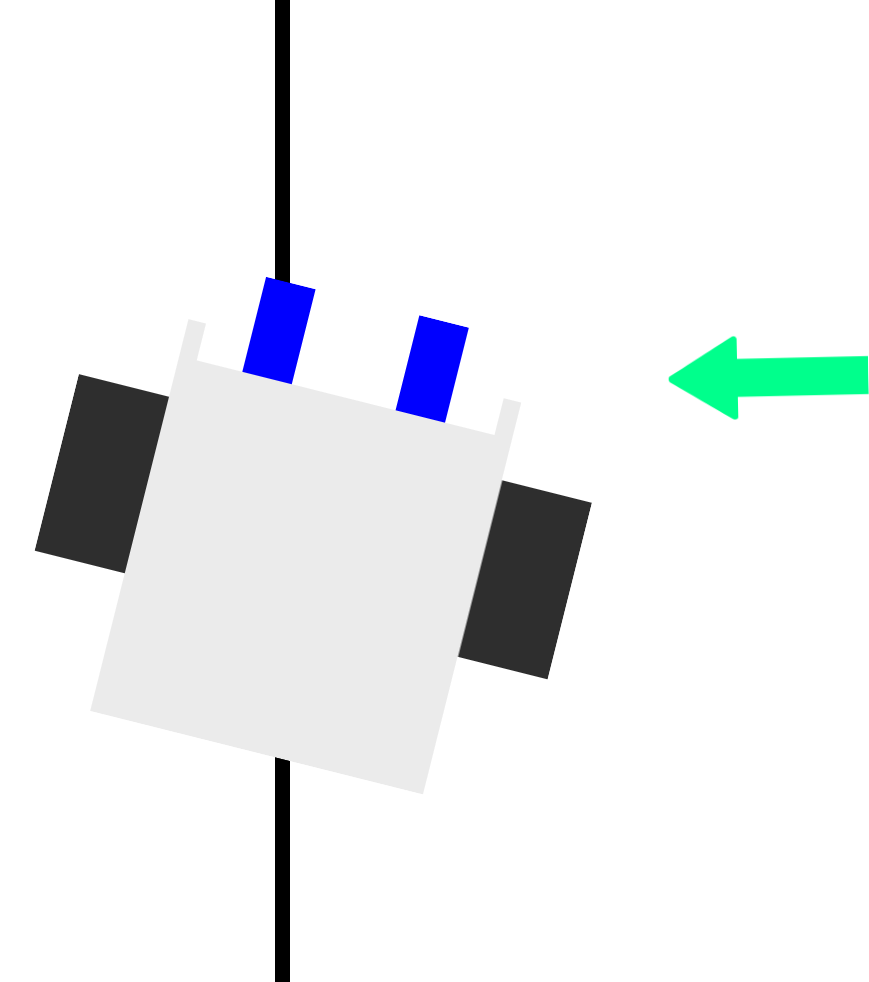 |
Code
// Line follower Example - Works with firmware 0v29 (download above)
void loop() { // main loop, runs continously

  display_manage_face();  // function handler for display animations
  interruptManager ();    // function handler for buttons and stuff
  periodicManager();      // function handler for perioic functions

  // LINE FOLLOWER EXAMPLE

  static uint8_t lineState = 0;
  if ( isStoppedMoving () == 1 )  {

    // get input from line sensors
    uint16_t lineSensorLeft  =  analogRead (36);
    uint16_t lineSensorRight =  analogRead (39);

    // determine the state. 3=left, 2=right, 0=stop, 1=straight (arbitrary)
    // approx. 16-48 is reflective meaning no black line.
    // approx. 2700-3300 is not reflective meaning black under the sensors
    // 1024 is around the midpoint of reflective and nonreflective

    if ((lineSensorLeft > 1024) && (lineSensorRight < 1024)) lineState = 3;
    if ((lineSensorLeft < 1024) && (lineSensorRight > 1024)) lineState = 2;
    if ((lineSensorLeft > 1024) && (lineSensorRight > 1024)) lineState = 0;
    if ((lineSensorLeft < 1024) && (lineSensorRight < 1024)) lineState = 1;

    // stop when the sensor registers something 12 cm in front of robot
    // state 4 has no action associated
    // if (distanceMeasure() < 12) lineState = 4;

    // give the state an action
    switch (lineState) {
      case 0: //stop
        moveRobotSteps ( 0, 0, 0, 0); // distance, angle, speed, accel
        // speed 1 to 125,
        // distance in steps (80 steps = 1 rev),
        break;
      case 1: //go straight
        moveRobotSteps ( 2, 0, 50, 125); // distance, angle, speed, accel
        delay (32);
        break;
      case 2: //turn right
        moveRobotSteps ( 2, 4, 50, 125); // distance, angle, speed, accel
        delay (32);
        break;
      case 3: //turn left
        moveRobotSteps ( 2, -4, 50, 125); // distance, angle, speed, accel
        delay (32);
        break;
    }
  }
}